Base Maps
Studio renders a base map under your data layers. This map serves as background context, containing location features such as labels, boundaries, bodies of water, and roads.
Base maps can be configured to meet your needs. You can:
- Select from a set of predefined map styles.
- Use your own custom base map styles.
- Reorder base map feature to optimize their visibility.
All base map options can be found in the Base Map tab in Studio.
Base Map Styles
Studio provides a set of predefined map styles from Mapbox and Kontur, Inc.
Open the base map style menu to change the map color scheme and imagery. The following options are available for use:
| Base Map | Provider | Description |
|---|---|---|
| No Basemap | No base map. Use the color selector to choose a background color for your visualization. | |
| Dark | Mapbox | Dark base map with light-colored text. |
| Light | Mapbox | Light base map with dark-colored text. |
| Muted Light | Mapbox | Light base map with light-colored text. |
| Muted Night | Mapbox | Dark base map with dark-colored text. |
| Satellite | Mapbox | Satellite imagery base map. |
| Satellite Street | Mapbox | Satellite imagery plus street names base map. |
| Streets | Mapbox | Street name base map. |
Note:
As of version 1.74, Kontur base maps are no longer supported in Foursquare Studio. All instances of these base maps have been replaced by default Studio light and dark base maps.
Custom Map Styles
You can add your custom base map style to Studio. Your base map style must be created on Mapbox, and must be accessible via URL.
Currently, Foursquare Studio only supports map styles that use Mapbox v1 style specification. This means Mapbox styles with attributes such as "pitch" are not supported, and thus cannot be imported into Studio.
Follow these steps to add a custom base map:
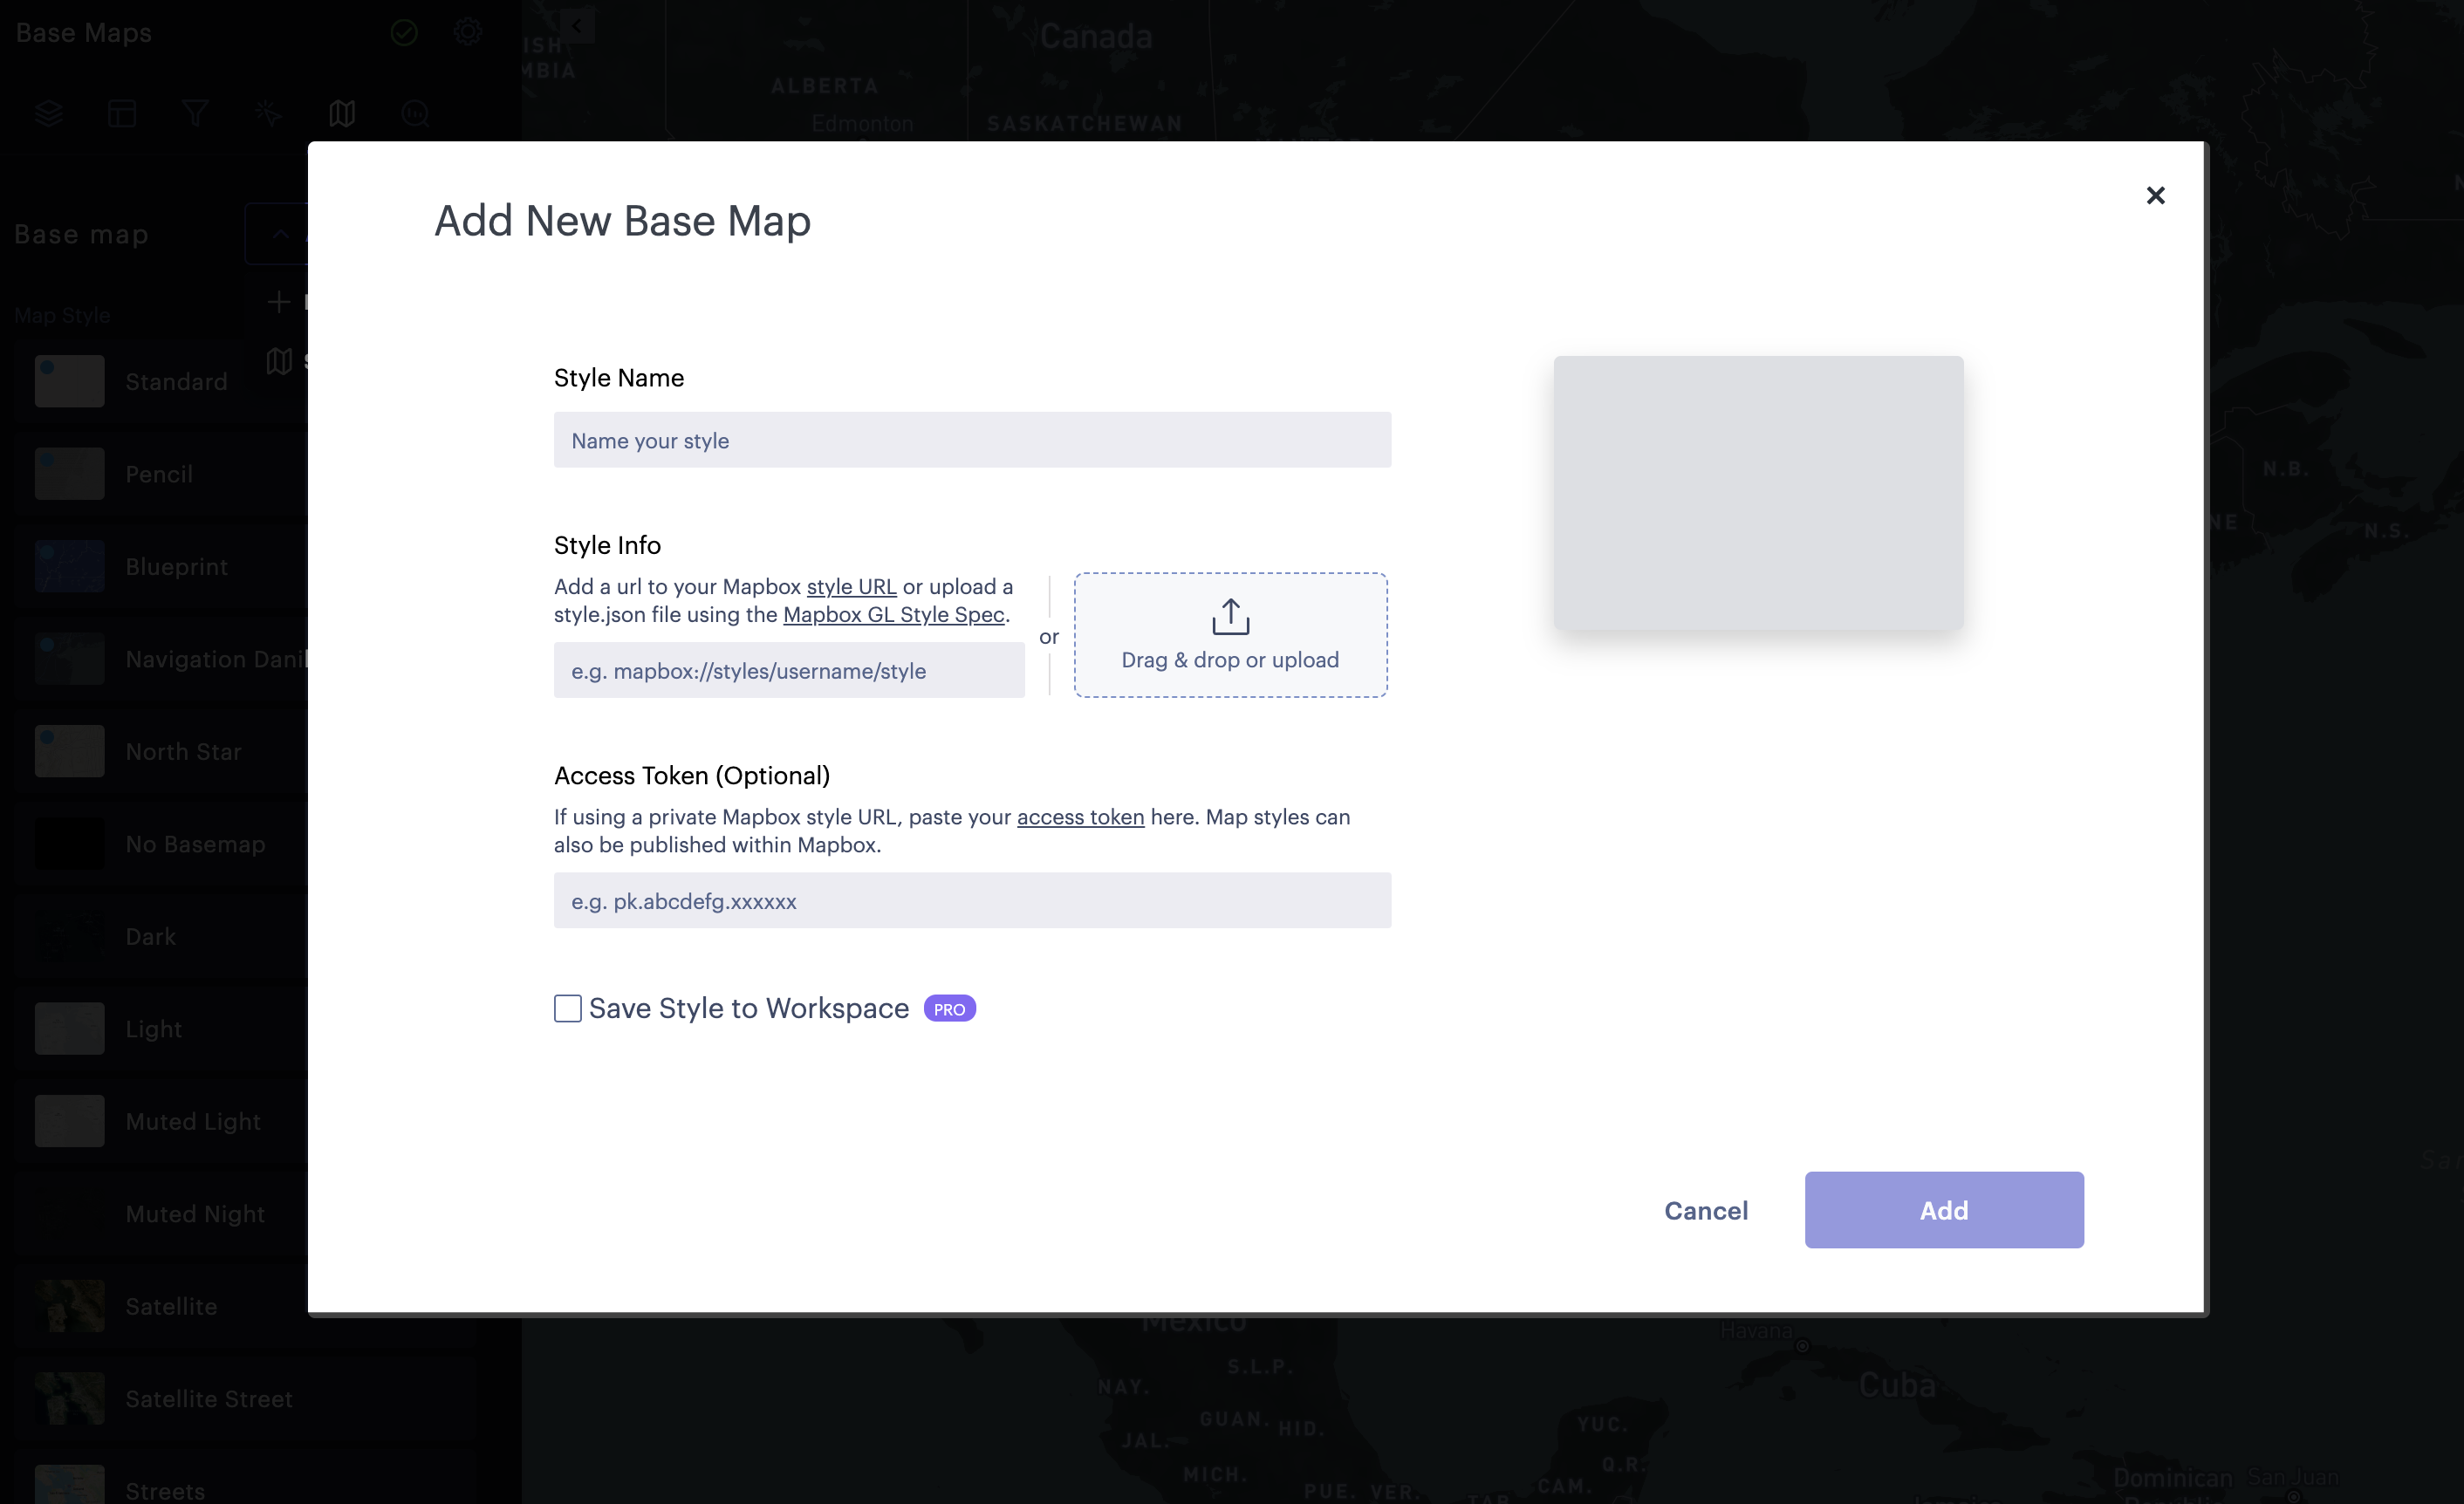
1. In the Base Maps tab, click Add Map Styles.
2. An input window will appear. Paste your Mapbox Style Url in the first box.
If your Mapbox Style is a draft or is not public, enter your mapbox access token in the second box.
Alternatively, drag and drop or click to select a style.json file using the Mapbox GL Style Spec.
3. Name your style, then click Add Style.

Adding a custom base map to Studio.
To change the map's name style URL, or access token, hover over the base map on the sidebar and click the Settings button.
Save Custom Base Maps
If you are an enterprise user, you can opt to save the base map to your library by clicking the Save Style to Workspace option. Saved base maps can be viewed in the Base Maps section of your workspace, and added to your other maps from the Add New Basemap button. Shared base maps can also be shared with your team in the Base Maps section of your workspace.
Base Map Options
Studio has a variety of Base Map options that allow you to expose and prioritize certain base map features.
Base Map Features
Base map features are organized under Map Layers:
| Feature | Description |
|---|---|
| Labels | Shows labels for cities, neighborhoods, and other notable areas. |
| Roads | Displays a translucent layer of road lines. |
| Borders | Shows state and country borders. |
| Buildings | Displays building footprints. |
| Water | Displays bodies of water. |
| Land | Shows parks, mountains, and other landscape features. |
| 3D Buildings | Shows 3D buildings on the map. 3D buildings are only visible in 3D map view. Resolution automatically updates based on the current zoom level. Use the color picker below to change the 3D buildings' color. |
Base Map Feature Visibility
While base maps provide background context for your geospatial data layers, you may want certain base map features (such as labels and/or roads) to remain clearly visible.
Click the Hide/Unhide button (represented by an open/closed eye) to hide/display a map feature.
Click the ↑ Move to Top to move the layer to the top of the map.
Tip:
Move labels on top of maps with opaque layers to ensure they are not concealed.
Globe View
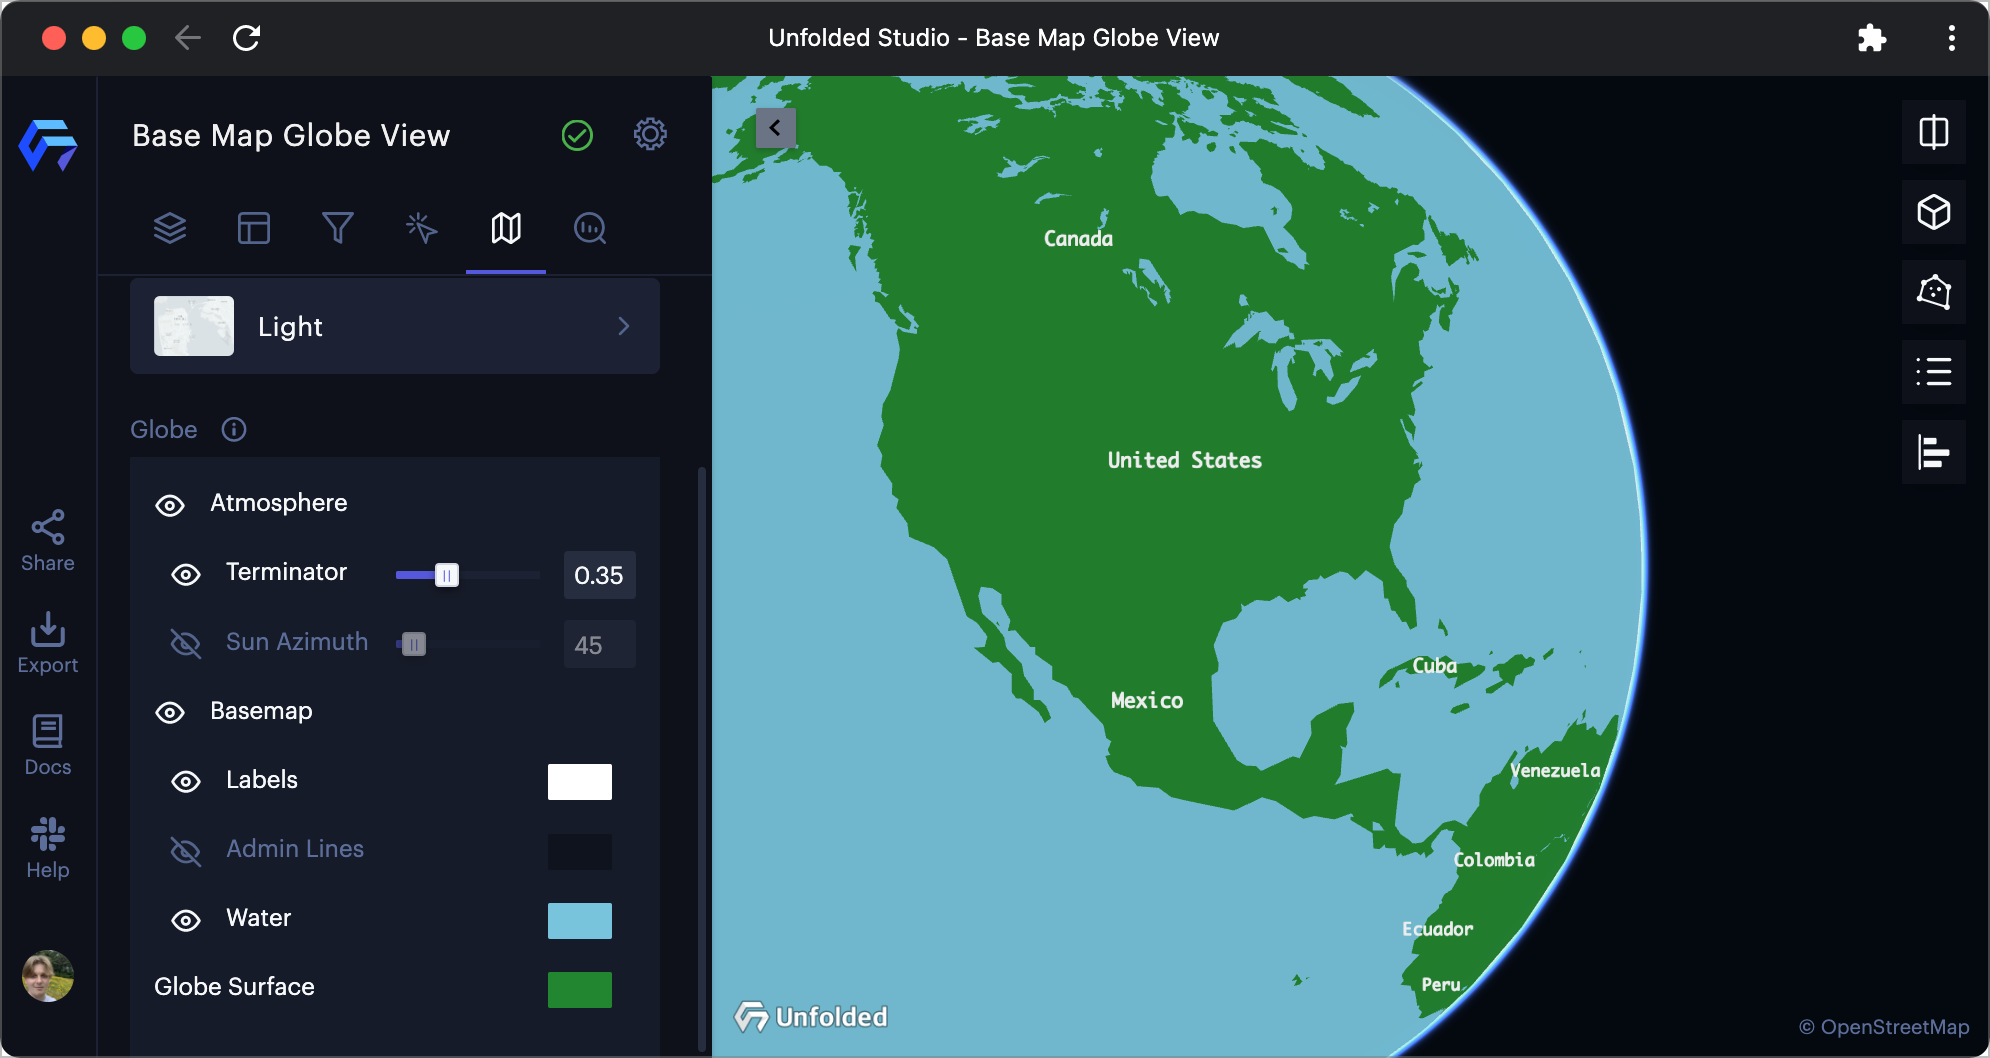
Mapbox base maps do not natively support Globe View. Instead, Studio implements custom globe rendering for Mapbox base map data. However, you may still customize the color of base map features while in Globe View.

Customized base map in Globe View.
Please refer to Globe View documentation for more details.
Updated about 2 years ago

 Enterprise feature. Contact us to learn more.