Grafana
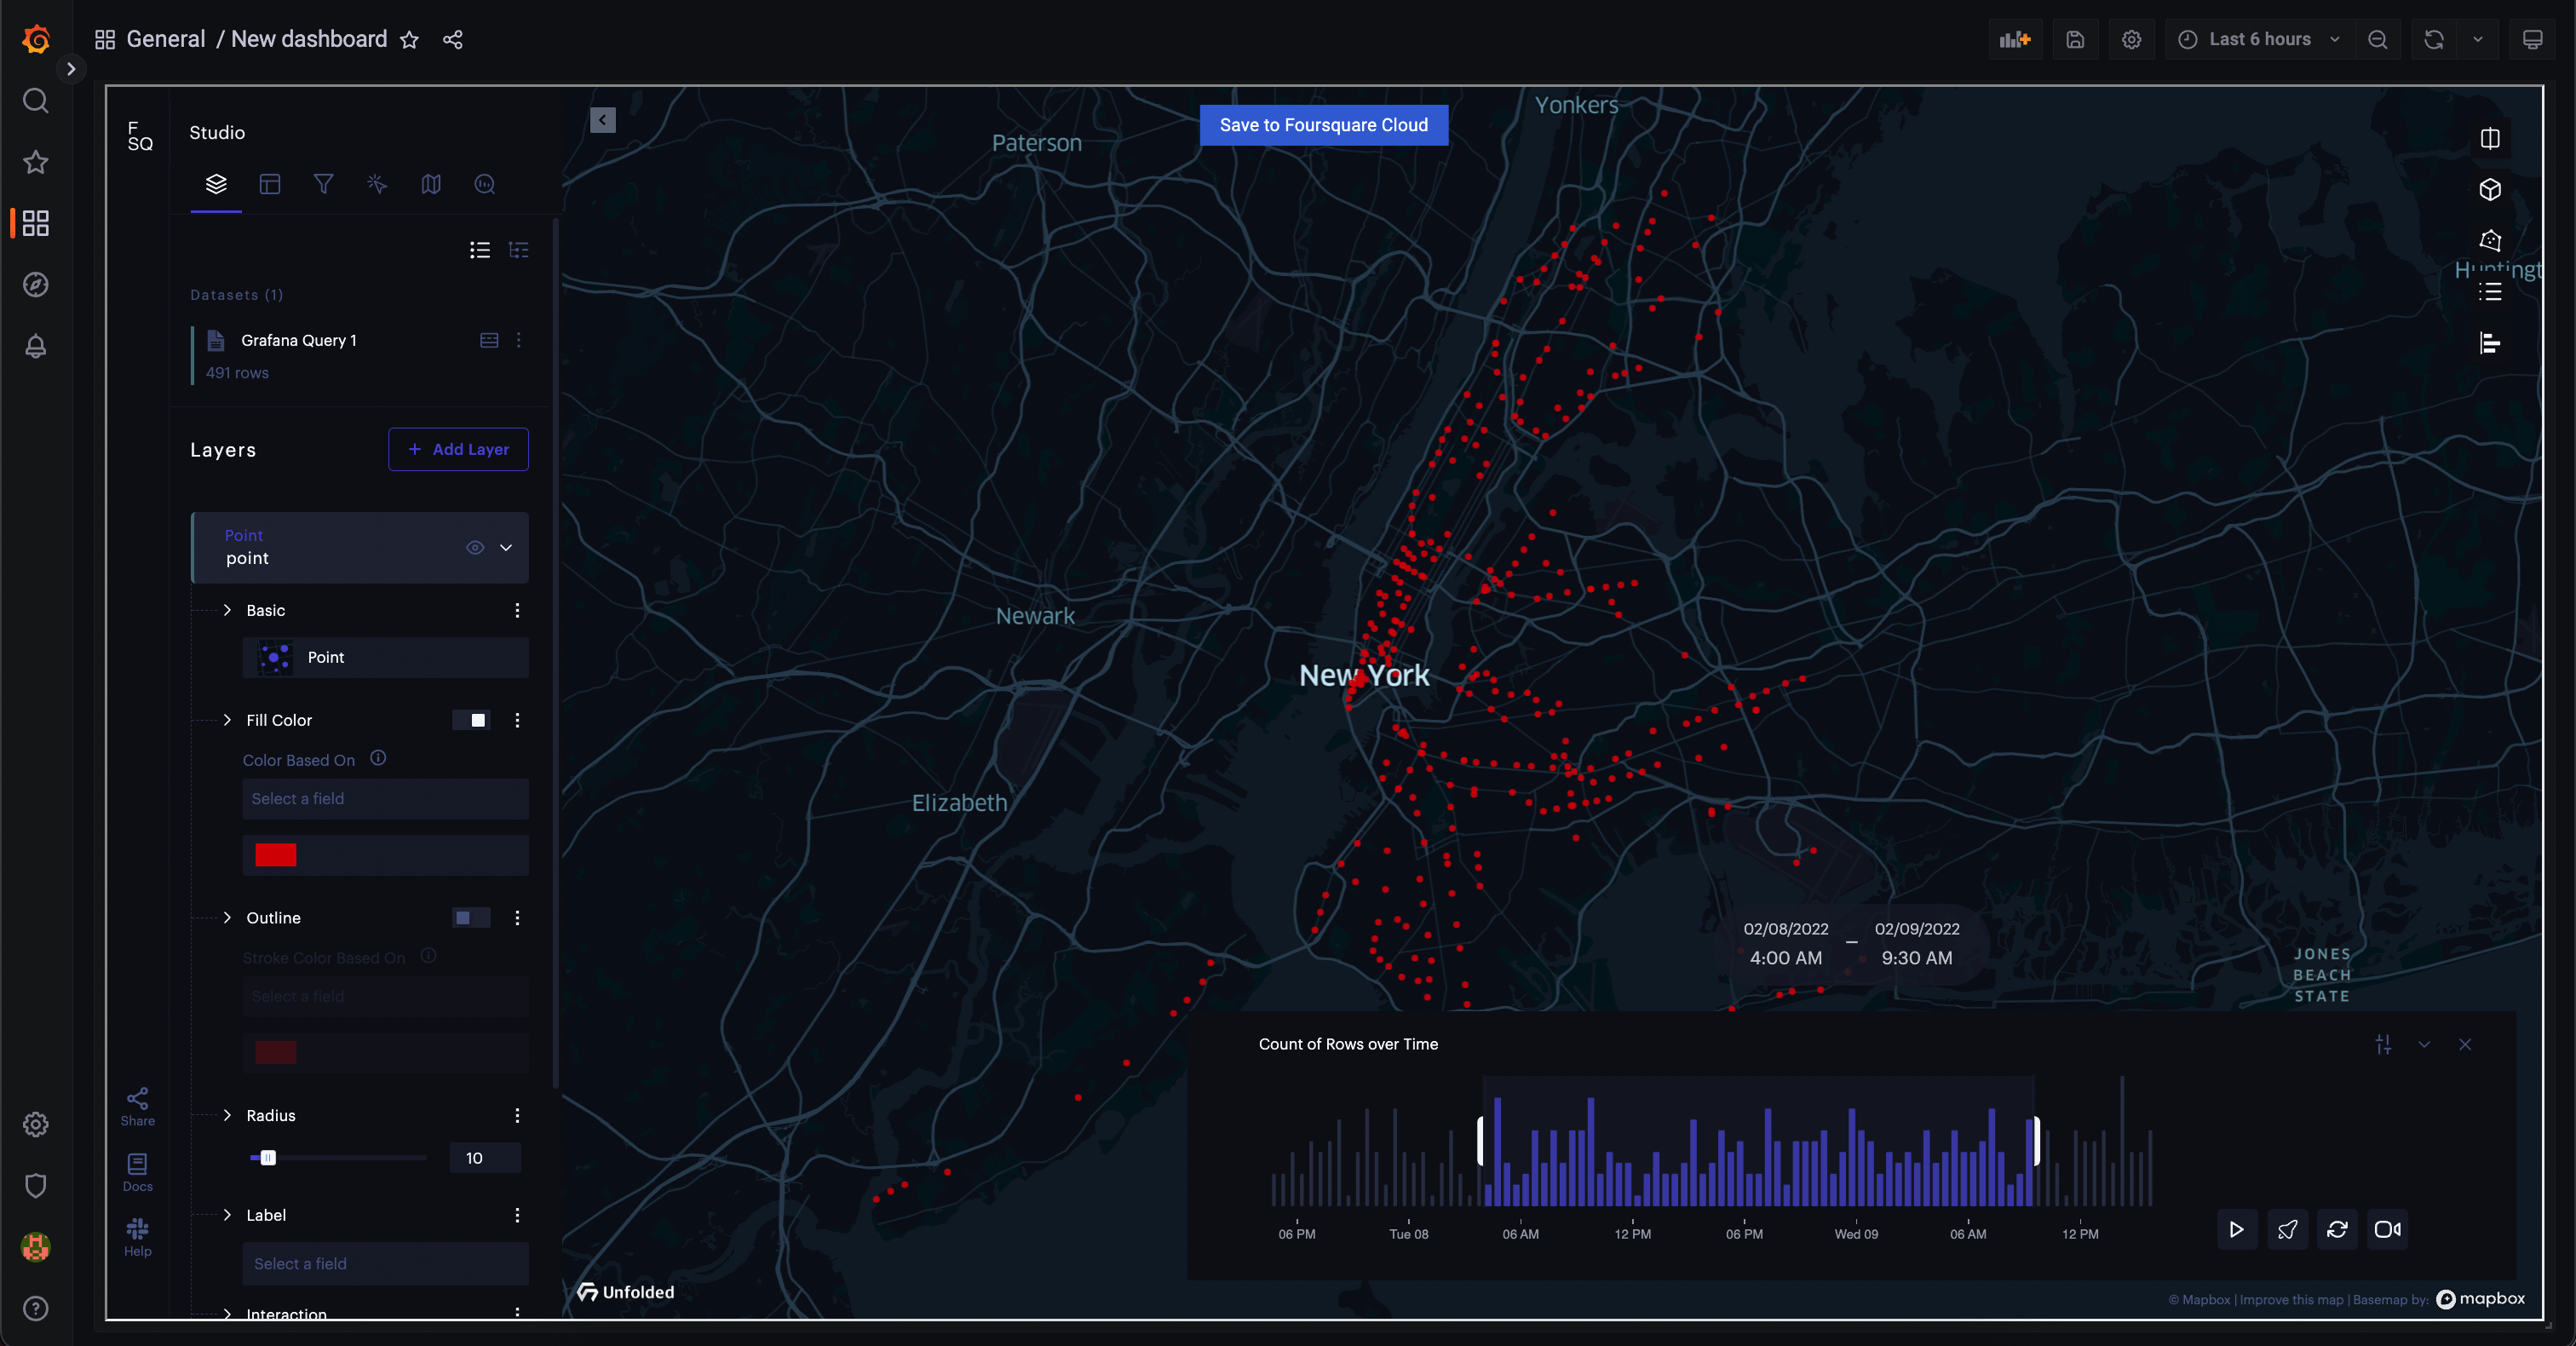
The Foursquare Studio Panel Plugin enables you to add Foursquare Studio Maps to your Grafana dashboard.
Note: The Foursquare Studio plugin is not currently available to new users on Grafana Cloud. See local installation instructions below.
Features
-
Visualize your geospatial data in your Grafana dashboard as:
- Points on the map
- A line (LineString) that connects the points based on the passed timestamp
- TripLayer that allows you to animate the received data based on the passed timestamp
- A GeoJSON layer
-
Save your map configuration in the Grafana instance so you don't lose your map settings when the data refreshes.
-
Save your map in the Foursquare Cloud at any time with the data from the Grafana queries
Installation
Note:
Requires Grafana version
7.0+
Download the desired version below:
After downloading the .zip file, you must extract it to your Grafana plugin directory. For example, the plugin directory defaults to /usr/local/var/lib/grafana/plugins on MacOS (and other Unix operating systems). For all other systems, please visit Grafana's documentation to help locate your Grafana's configuration file, which contains the default path to your plugin directory.
After locating your plugin directory, you may either install the plugin via a CLI command (recommended) or unzip the file in the plugin folder.
To install via CLI, run the following command:
unzip foursquare-studio-panel-1.2.0.zip -d YOUR_PLUGIN_DIR
If you installed while Grafana was active, restart your instance. (On MacOS, you can restart grafana by running: brew services restart grafana).
Verify the installation is complete by navigating to the Administration > Plugins page. Find Foursquare Studio Panel, published by Foursquare Labs.
If you installed the package from a verified source, it will appear with a Signed tag:

Foursquare Studio Panel showing signed and installed status.
Usage
Displaying data as Points on the map
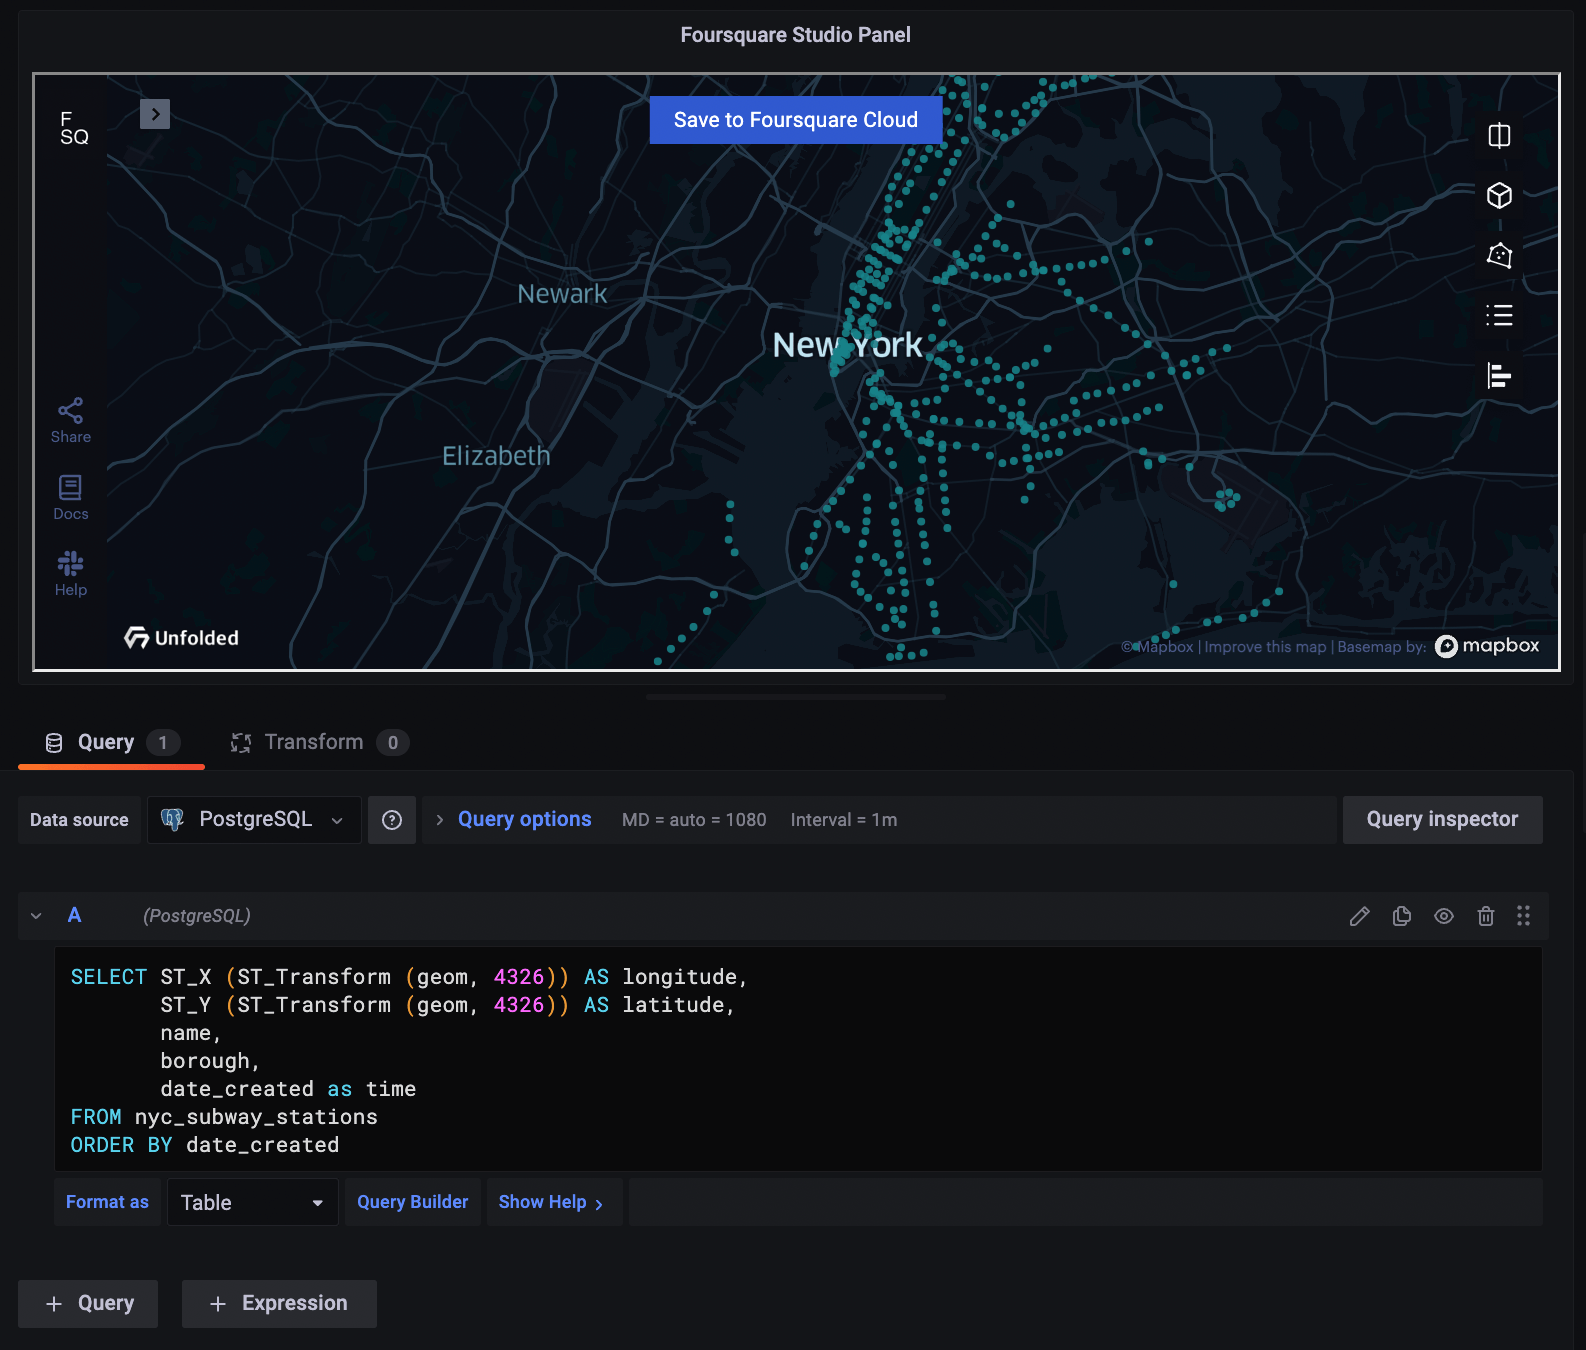
Visualizing the data as Points on the map doesn't require any time field only the location. You need to provide the values for the latitude and longitude values and you need to name these values exactly like that in the query. The order of the properties isn't important.
An example of a query for getting the latitude and longitude against a PostgreSQL (with PostGIS) database:
SELECT long AS longitude,
    lat AS latitude
FROM table_name
For example it would be a similar query if you are using the geometry data type in PostGIS:
SELECT ST_X (ST_Transform (geom, 4326)) AS longitude,
   ST_Y (ST_Transform (geom, 4326)) AS latitude
FROM table_name
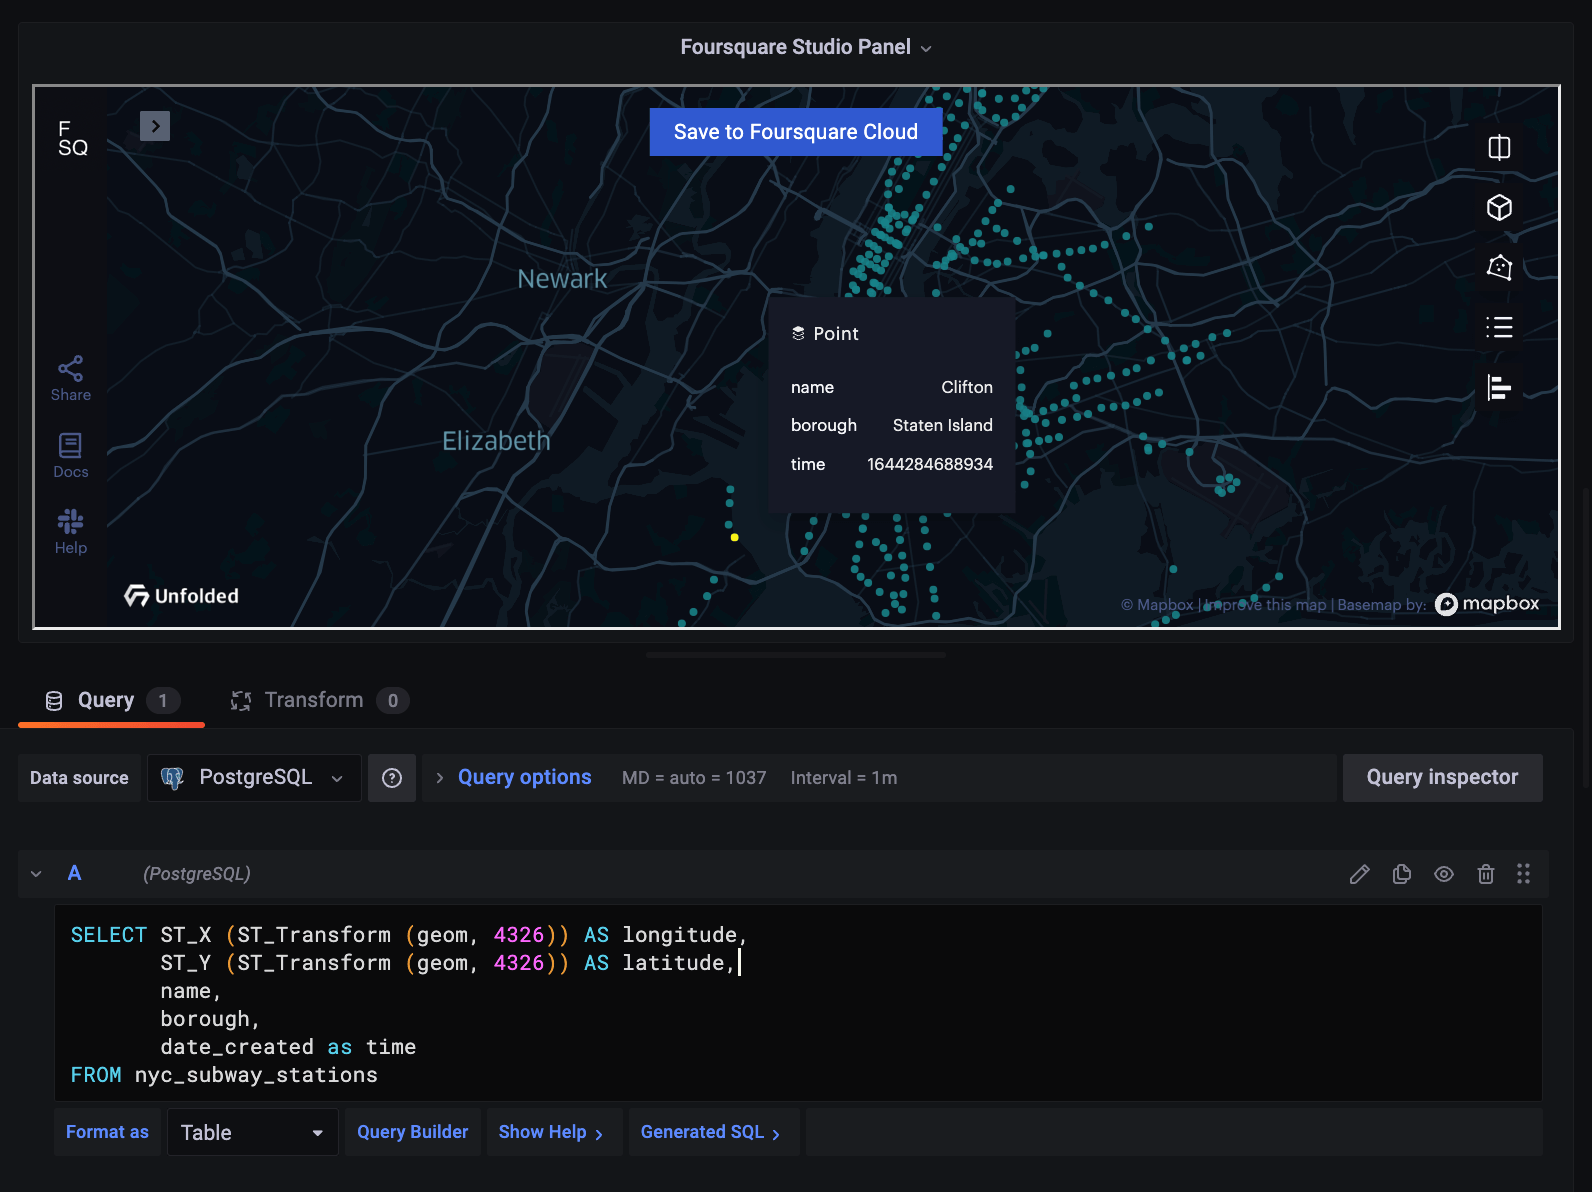
If you want to visualize more properties in the tooltip of the created points, you just need to add that data to the query:
SELECT ST_X (ST_Transform (geom, 4326)) AS longitude,
       ST_Y (ST_Transform (geom, 4326)) AS latitude,
       name,
       borough,
       date_created as time
FROM nyc_subway_stations
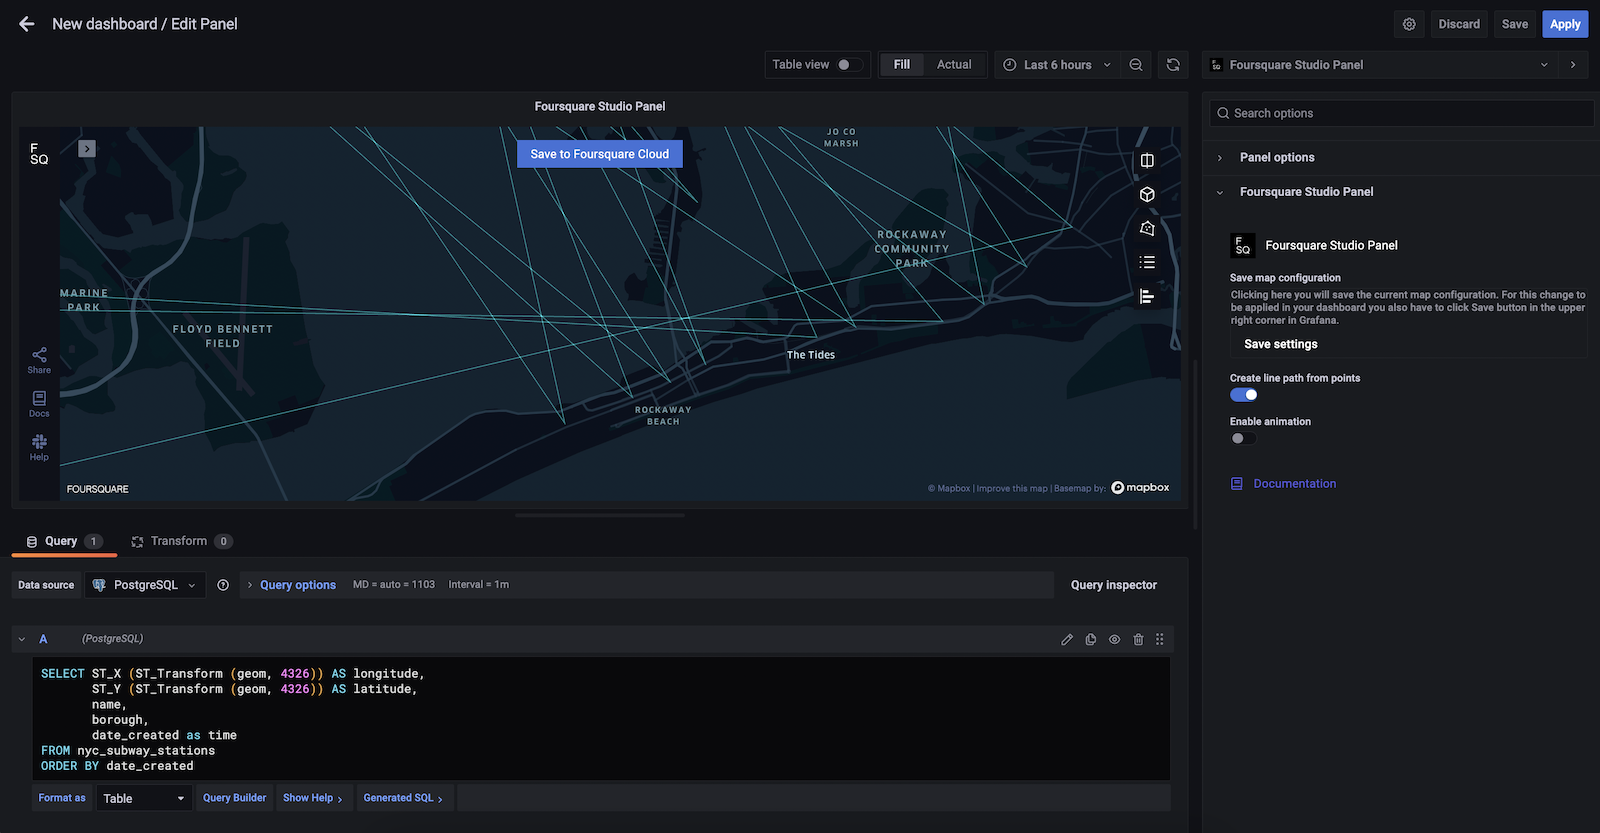
Display a line that connects the points based on the passed timestamp
Similar to the creation of Points, to create a line that connects the points you need to provide the time value (as Unix timestamp) in the ascending order for the respective row. Keep in mind to name the properties in the query as latitude, longitude and time.
To show the line you need to toggle the Create line path from points to true in the panel options.
SELECT ST_X (ST_Transform (geom, 4326)) AS longitude,
       ST_Y (ST_Transform (geom, 4326)) AS latitude,
       date_created as time
FROM nyc_subway_stations
ORDER BY time
Animate the data using the TripLayer
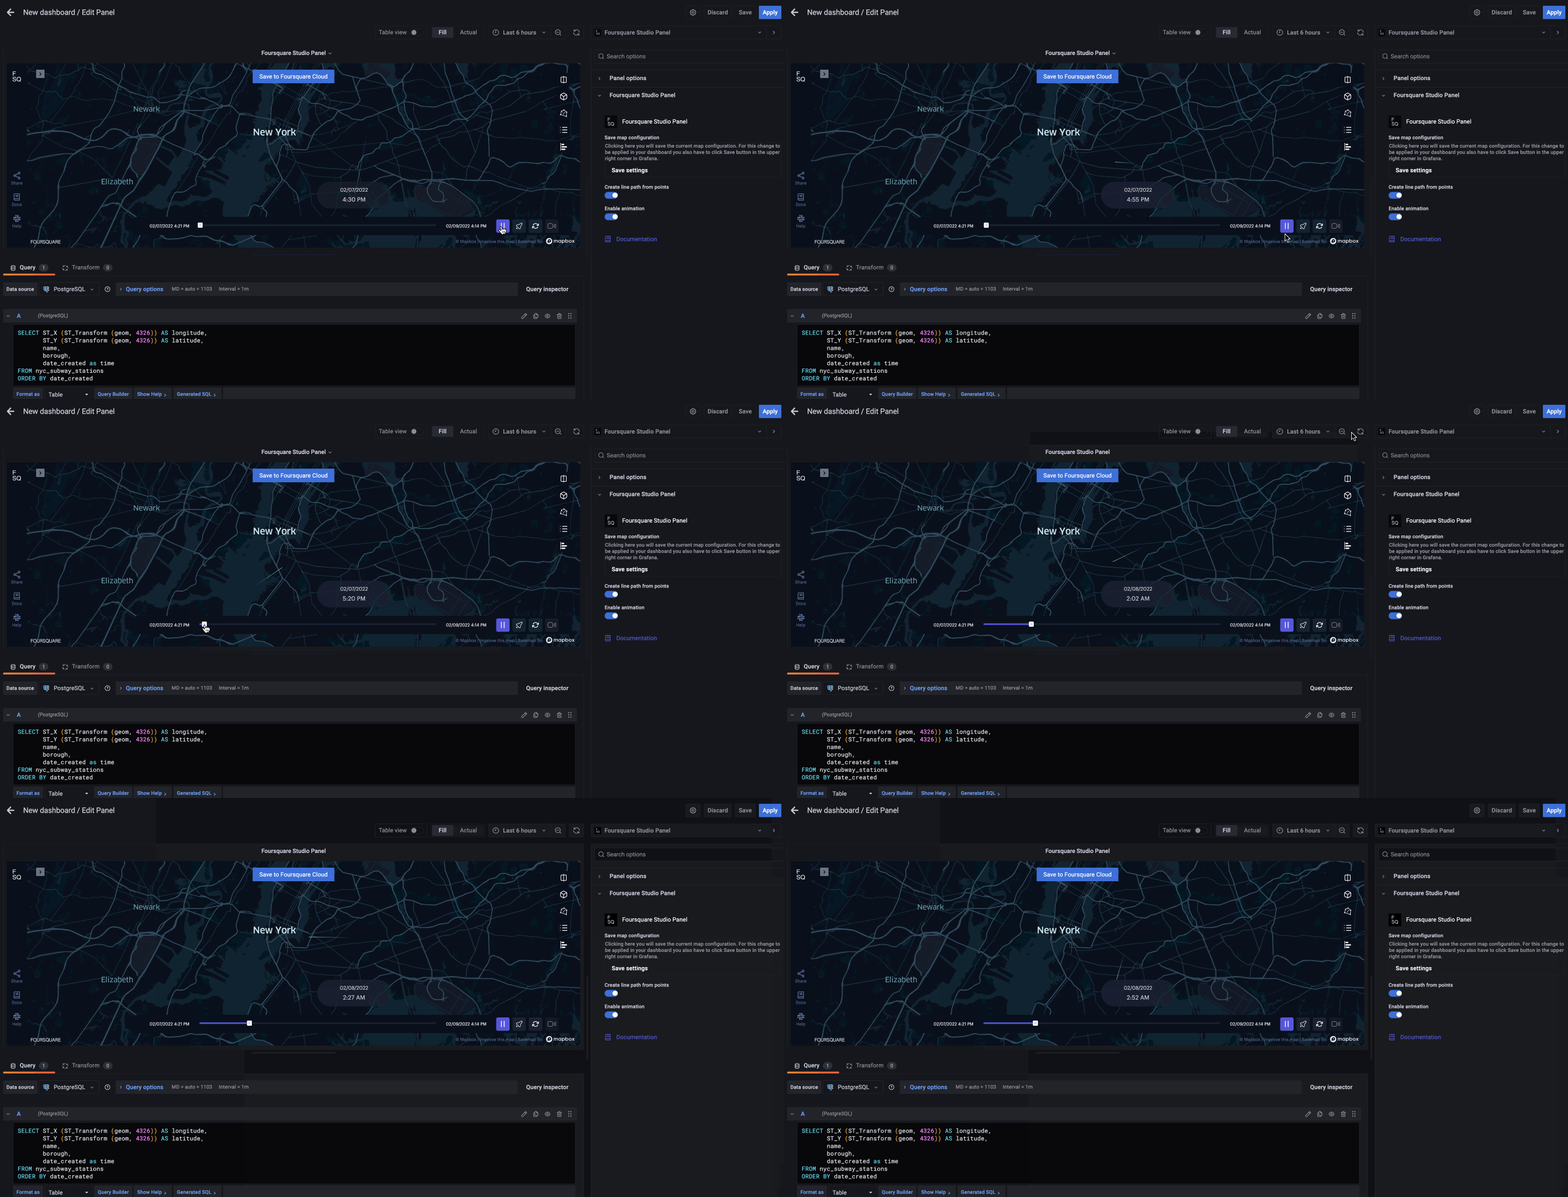
If you want to leverage more advanced features of Foursquare Studio you can animate the time-based data by toggling the Enable animation to true in the panel options. To enable this option, Create line path from points must be set to true in the panel options. Same query as in the line creation should be provided.
This will create a TripLayer on the map and add a timeline animation control on the map. To customize this control see our official documentation.
SELECT long AS longitude,
   lat AS latitude,
   date_created as time
FROM nyc_subway_stations
ORDER BY table_name
Display a GeoJSON object
If you are able to leverage your database to get a single GeoJSON object, you can provide it to the plugin to be displayed on the map. Keep in mind to name the value as geojson_layer.
An example of a query for getting the GeoJSON LineString object against a PostgreSQL (with PostGIS) database:
SELECT ST_AsGeoJSON(ST_MakeLine(ST_Transform(geom, 4326) ORDER BY date_created)) AS geojson_layer
FROM table_name
An example of a query for getting the custom GeoJSON feature object with selected properties against a PostgreSQL (with PostGIS) database. This query will include all properties except for gid, geom values. Keep in mind to name the value as geojson_layer.
SELECT jsonb_build_object(
 'type',     'FeatureCollection',
 'features', jsonb_agg(features.feature)
) as geojson_layer
FROM (
SELECT jsonb_build_object(
 'type',       'Feature',
 'id',         gid,
 'geometry',   ST_AsGeoJSON(ST_Transform(geom, 4326))::jsonb,
 'properties', to_jsonb(inputs) - 'gid' - 'geom'
) AS feature
FROM (SELECT * FROM nyc_subway_stations) inputs) features;
In case you have a GeoJSON object for each individual Point in the row, you can just create a simple query as when you are creating a regular point, just provide the geojson instead of the latitude and longitude values. In this case name the property value as geojson and not as geojson_layer.
SELECT ST_AsGeoJSON(ST_Transform(geom, 4326)) AS geojson
FROM nyc_subway_stations
Save your Map Configuration
Any changes made in Foursquare Studio (layers, filters, interactions, base map settings) can be saved in your Grafana instance, and they will be applied when the plugin is initialized.
For example if you changed the Base Map Style from Dark to Light and you want to save that setting you need to:
- Click the
Savebutton under theSave map configurationsection
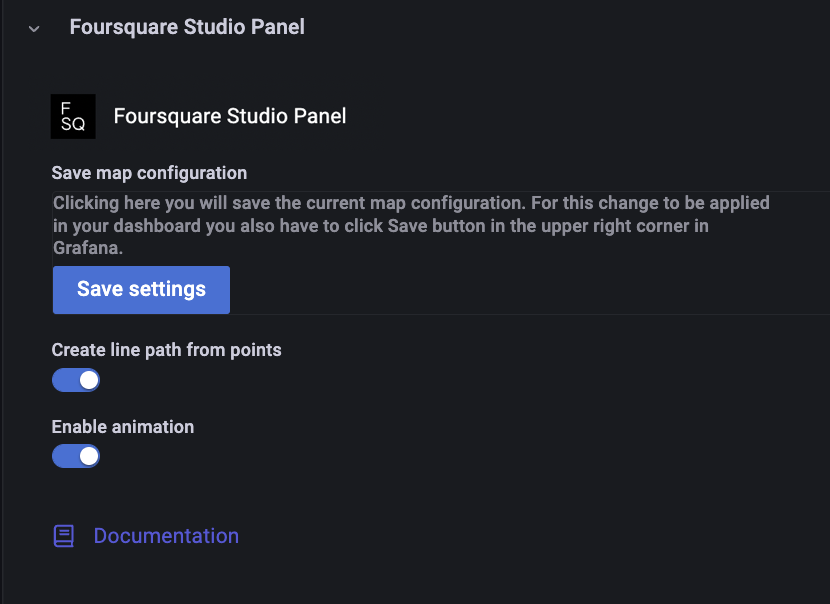
- Apply that change with clicking
Savein the top right corner of your Grafana panel settings to confirm your changes

Save Grafana Maps to your Foursquare Cloud Account
In case you want to save and share maps visible in your Grafana Panel, you have the ability to save a map (along with any data from the panel's queries) to your Foursquare Studio account.
Required steps to save your map:
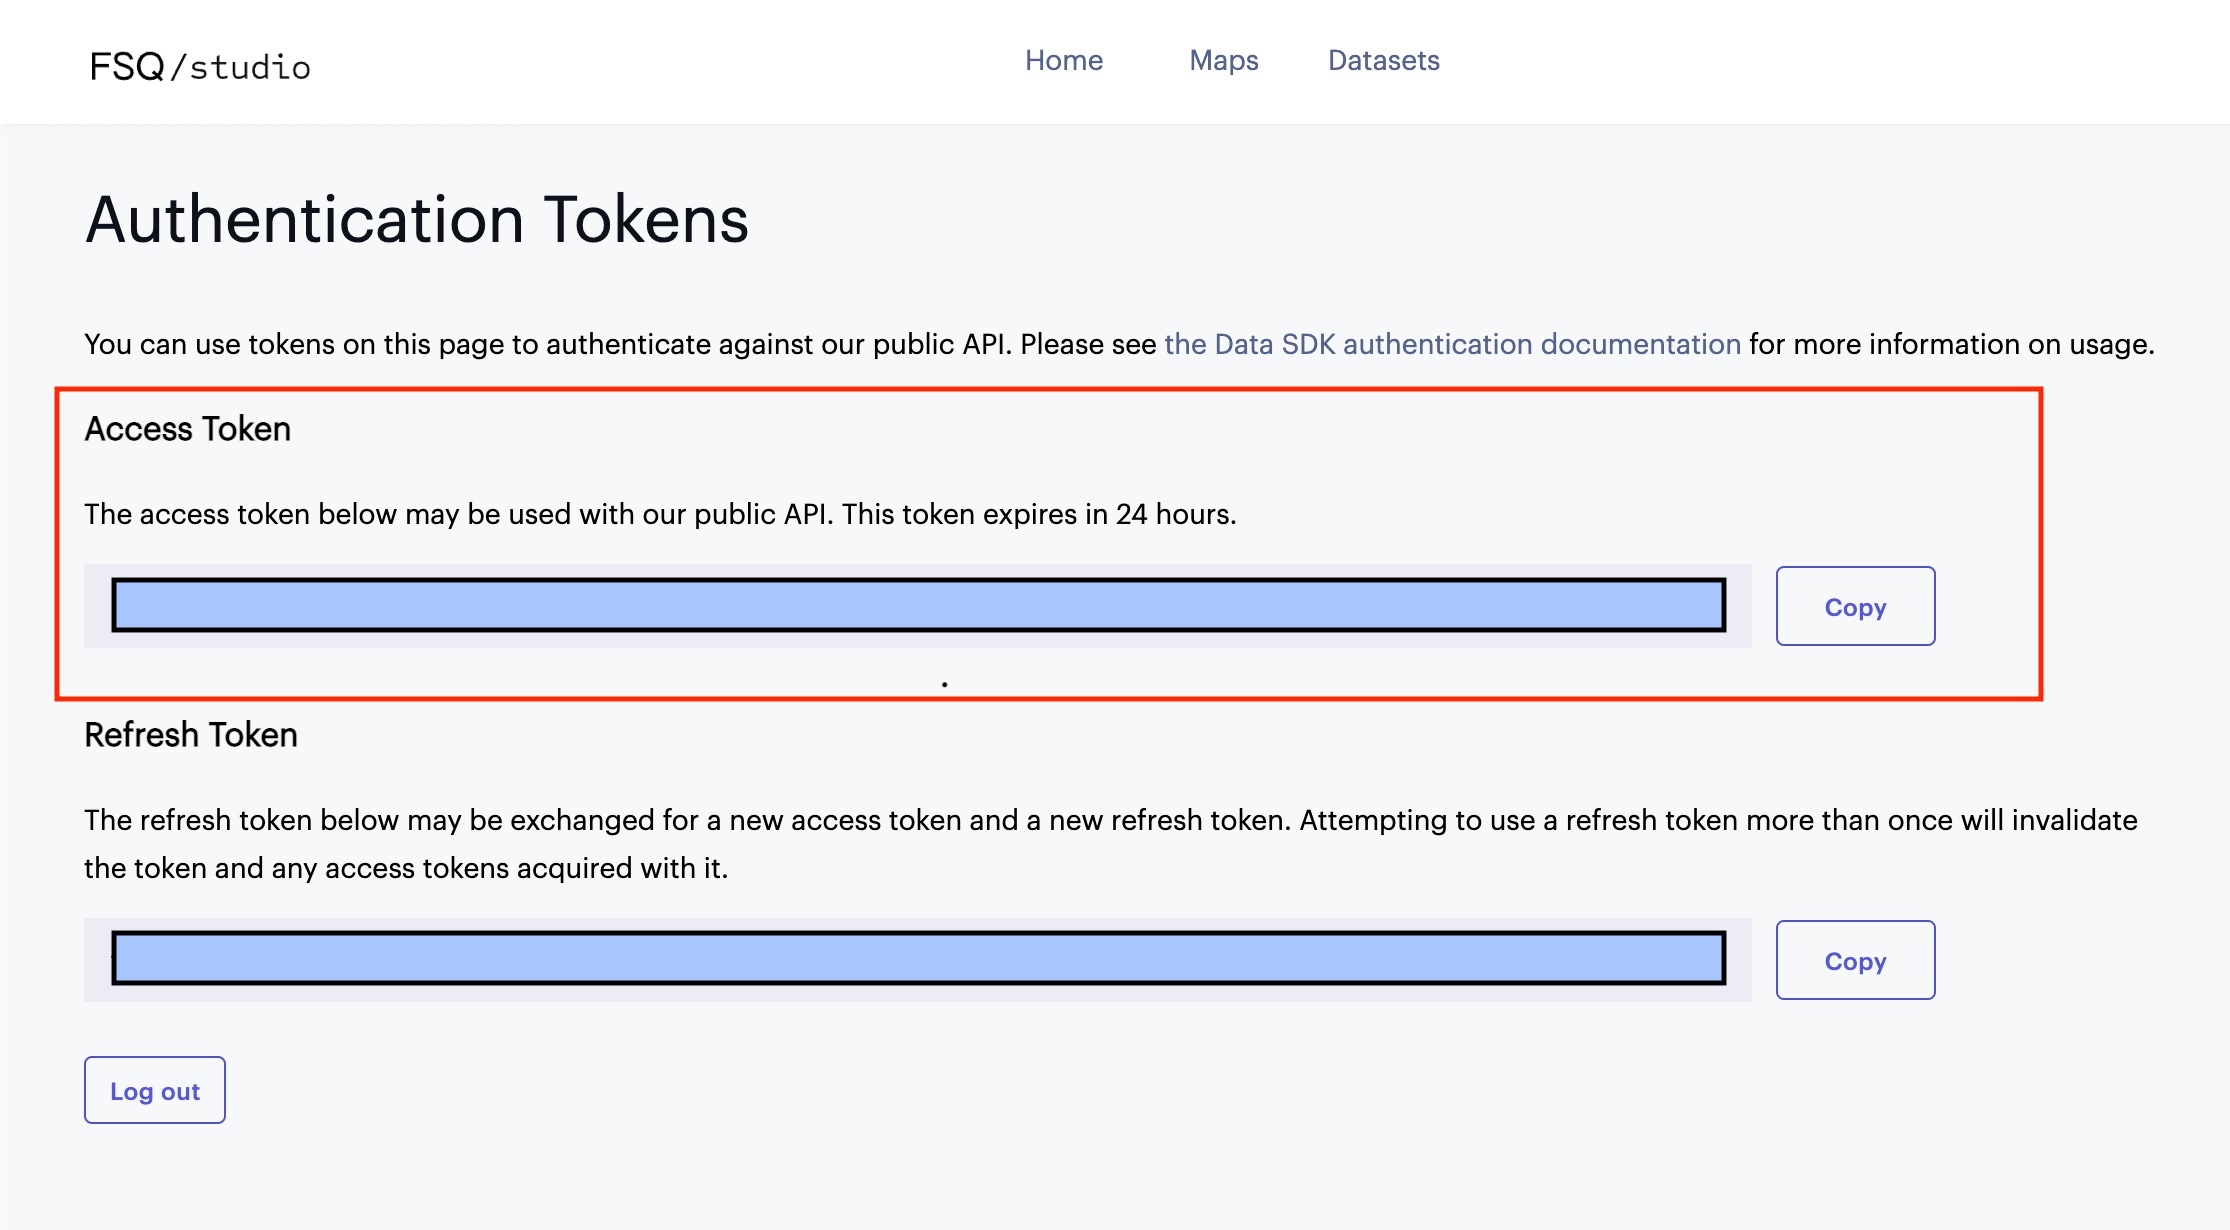
- Log in to your account in Foursquare Studio
- Copy your Access Token
- Go to your Foursquare Studio Panel Plugin settings
- Click on
Save map to Foursquare Cloudbutton - Paste the token in the
Add Access Tokenfield - Optionally you can also add map name and description values
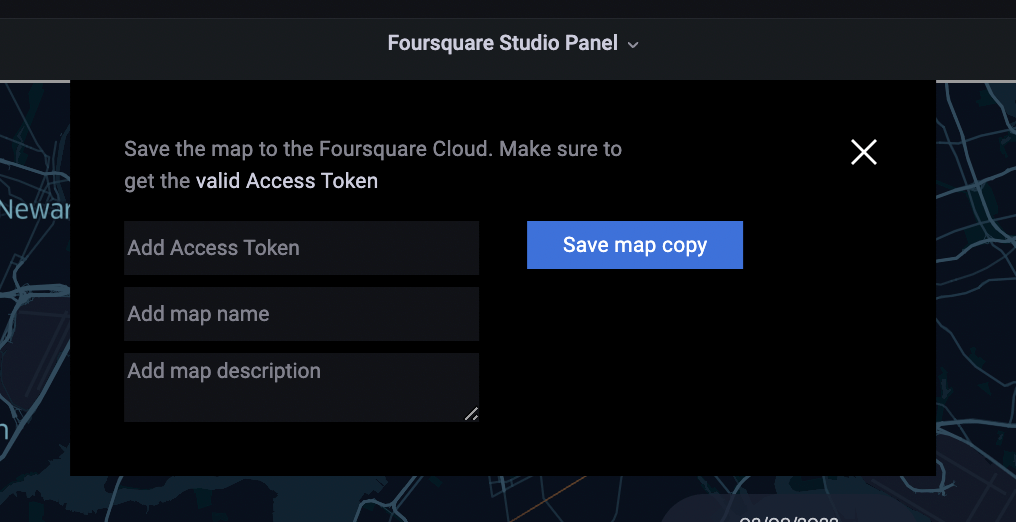
If the request is successful you will get the saved map URL at the bottom of the section.
Keep in mind that the created map is still private and you would have to publish it in Foursquare Studio to be able to share it publicly.
Add multiple queries
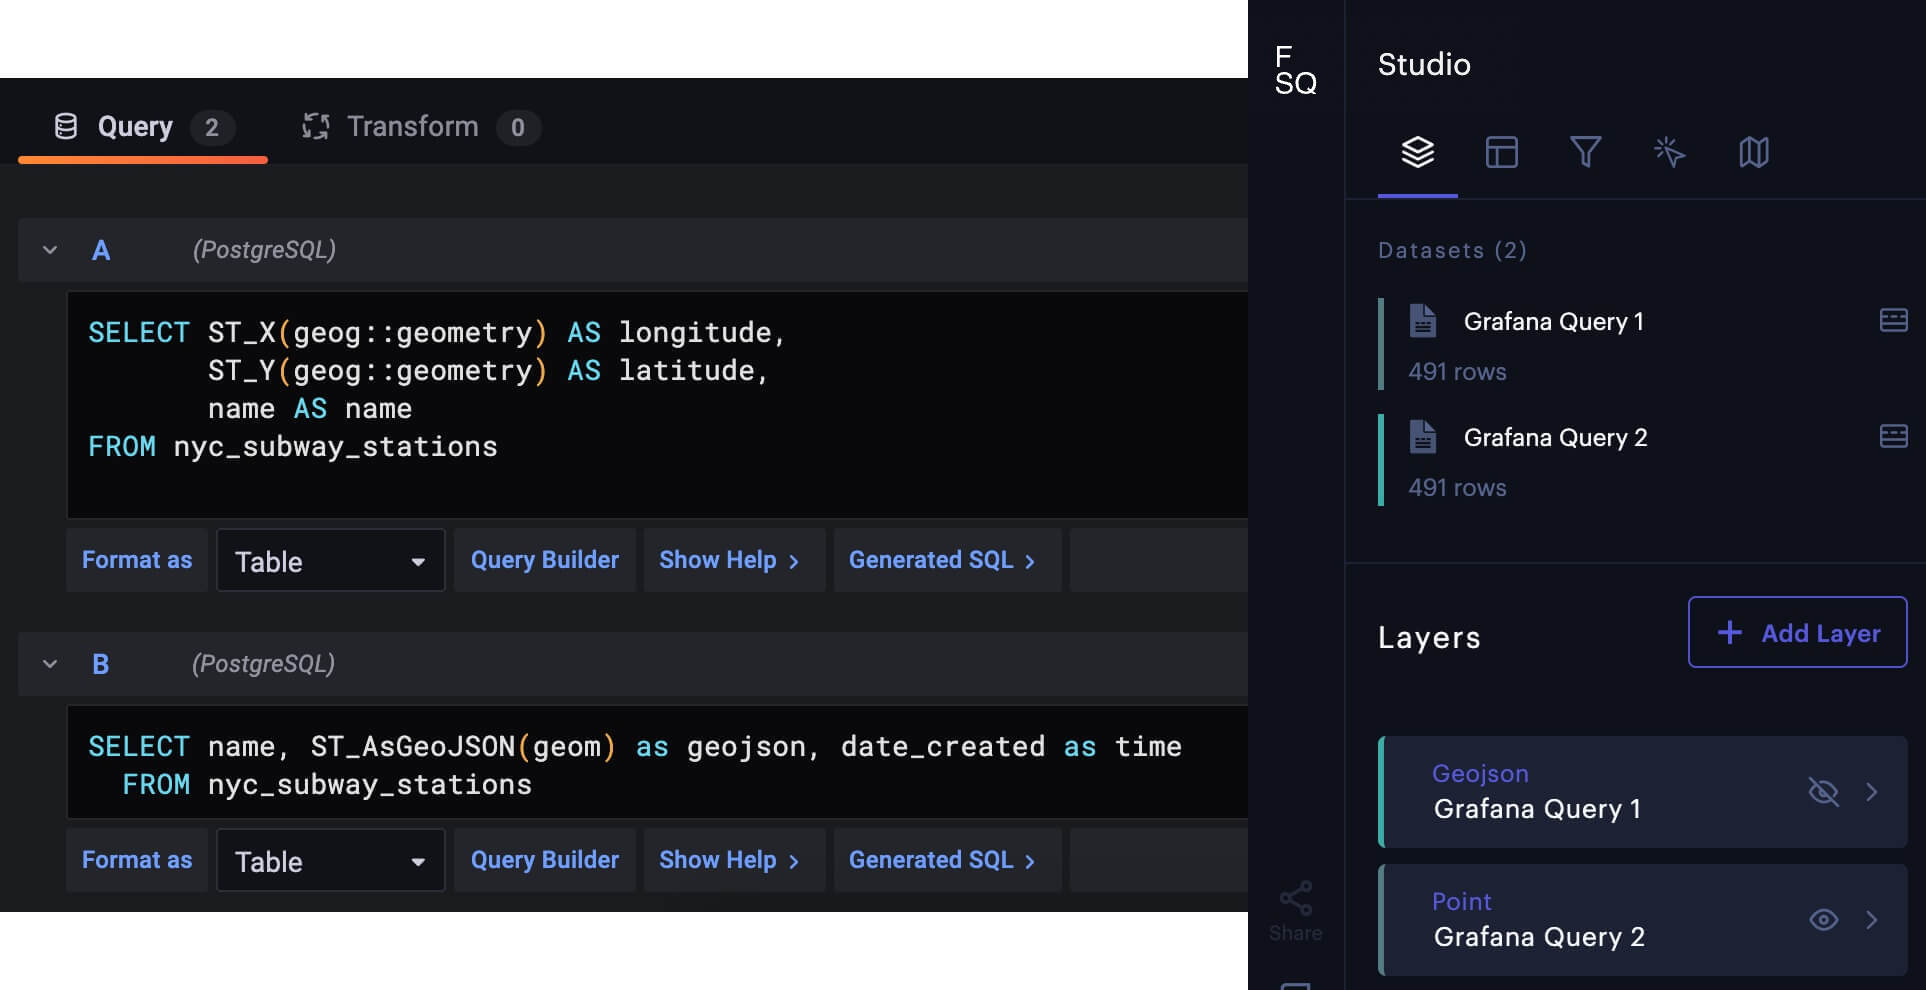
Plugin allows you to add multiple queries where the result of each query will be added as a separate dataset and layer in the Foursquare Studio Panel.
Updated over 1 year ago
